 how-to
How to Edit Real Estate Photos with Layers
Table of Contents
- Why Layers Matter for Real Estate Photography
- Understanding the Layer Panel and Layer Organization
- Real Estate Photo Editing in Photoshop: Adding Images to Layers
- Real Estate Photo Exposure Blending for Window Pulls
- Real Estate Photo Editing Layers and Masks: Non-Destructive Techniques
- Complete Beginner Workflow: Editing a Real Estate Photo Start to Finish
- Common Mistakes to Avoid When Editing with Layers
- Keyboard Shortcuts and Efficiency Tips
- Frequently Asked Questions
Last Updated: October 6, 2026
Why Layers Matter for Real Estate Photography
Learning how to edit real estate photos with layers is your most powerful tool for professional results.
Think of layers as sheets of transparent paper stacked on top of each other, each holding different edits. You can adjust, hide, or delete any layer without affecting the others, so you can experiment freely.
Real estate photography often requires fixing tricky lighting: windows blow out, interiors look dark, shadows hide details. Layers solve these problems by combining the best parts of multiple shots into one image.
Understanding the Layer Panel and Layer Organization
The Background Layer and Pixel Layer Basics
Every image starts with a background layer, your original photo. It's locked by default, so you can't erase parts of it or change its transparency.
A pixel layer is any layer containing actual image data (pixels).
To unlock your background layer, double-click it in the Layers panel. Most professionals do this immediately because it removes limitations and opens up more editing options.
Background layers are restricted; regular layers are flexible. Start every project by unlocking your background layer for full control.
Creating and Selecting Multiple Layers
Creating new layers is simple. Go to Layer menu, select New, and choose Layer, or use Shift+Ctrl+N (Windows) or Shift+Command+N (Mac).
You can also click the plus icon at the bottom of the Layers panel to add a blank layer instantly. Drag layers up and down to change their stacking order, top layers show first, so arrange them by importance.
Selecting the right layer matters. Click any layer in the Layers panel to select it, it gets a blue highlight, and only the selected layer responds to your edits.
Real Estate Photo Editing in Photoshop: Adding Images to Layers
How to Add an Image to an Existing Layer in Photoshop
The most powerful technique in real estate photo editing is combining multiple exposures by bringing a second image into your working file as a new layer.
Open your first image in Photoshop, go to File, select Open as Layers, browse to your second image and click Open. Photoshop places it as a new layer on top, ready to blend.
The new layer usually appears too large or misaligned. That's normal. You'll resize and position it next using the Transform tools.
Using the Place Command and Transform Tools
The Place command works similarly but gives you more control. Go to File, select Place Embedded (or Place Linked for large files), and choose your image.
Drag the corners to resize, drag inside the image to move it, and hold Shift while dragging a corner to keep proportions locked. Press Enter to confirm.
Transform is your friend. Master these keyboard shortcuts to work faster:
- Ctrl+T (Windows) or Command+T (Mac): Activate Transform tool anytime
- Shift+drag corner: Resize while keeping proportions
- Ctrl+drag (Windows) or Command+drag (Mac): Skew or distort the layer
Position your exposures carefully, even small misalignments become obvious when you blend layers. Zoom in to 100% and check the edges before confirming.
Real Estate Photo Exposure Blending for Window Pulls
Working with Bracketed Shots and Different Exposures
Bracketing solves the window problem: a single exposure can't capture detail in a bright window and show interior details at the same time, but bracketing lets you capture both and blend them together.
Import all three exposures as layers in Photoshop. Stack them in order: dark on top, normal in the middle, bright on bottom. Blend them using layer opacity and masks to create one balanced image.
Blending Layers for Natural Window Exposure
Start with your dark exposure on top, this layer protects the bright windows.
Opacity is the transparency slider in your Layers panel. Drag it left for more transparency, right for more opacity.
Next, add a layer mask to your dark exposure by clicking the Add Layer Mask button (white rectangle icon) at the bottom of the Layers panel.
This technique is called exposure blending. It's the foundation of professional real estate editing. The result looks natural because you're combining actual exposures, not artificially brightening or darkening.
Real Estate Photo Editing Layers and Masks: Non-Destructive Techniques
Layer Masks and Selection Tools
A layer mask is a grayscale image attached to a layer. White areas show the layer. Black areas hide it. Gray areas show partial transparency.
Create a mask by clicking the Add Layer Mask button in the Layers panel.
Use a soft brush for smooth transitions, a hard brush creates visible edges.
Selection tools let you create precise masks: the Rectangular Select tool for square areas, the Free Select tool (lasso) for custom selections, and the Quick Selection tool for similar colors.
Luminosity Masks for Selective Adjustments
A luminosity mask is based on the brightness levels in your image: bright areas get a white mask, dark areas get a black mask.
Luminosity masks are advanced but powerful: brighten dark corners without affecting already-bright windows, or darken blown-out highlights without touching interior shadows.
For real estate photos, luminosity masks solve the common problem of uneven lighting. Use them to balance exposure across the entire image while keeping everything looking natural.
Complete Beginner Workflow: Editing a Real Estate Photo Start to Finish
Step 1: Import and Organize Your Images
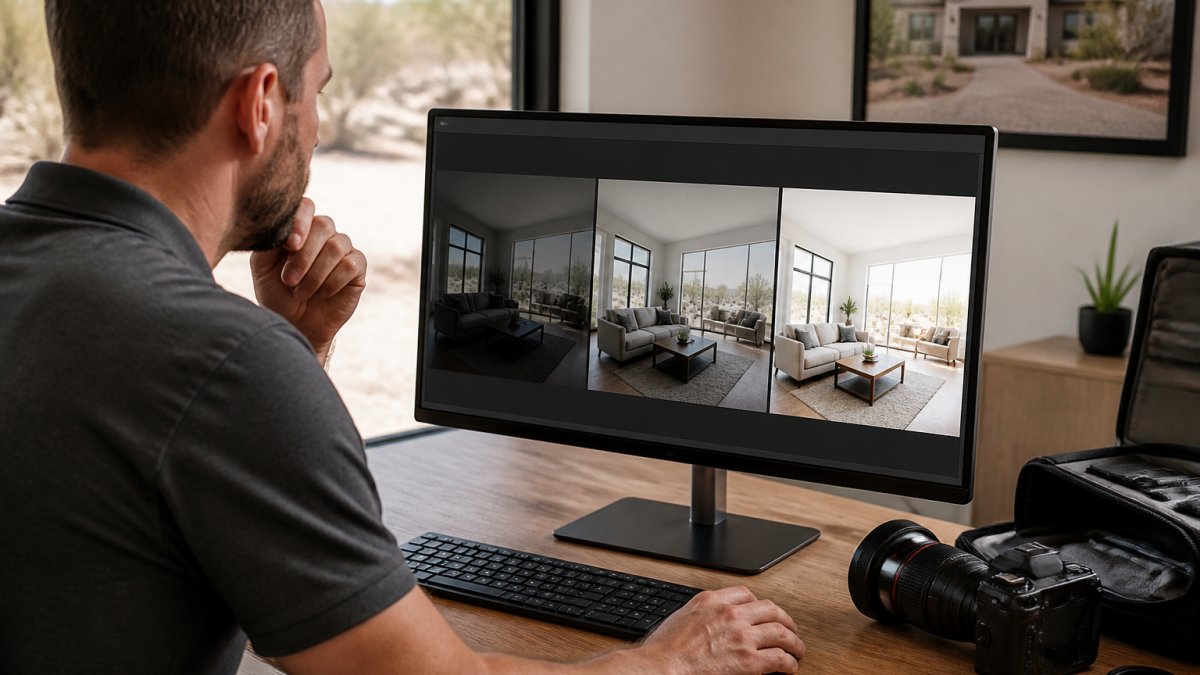
Start with your three bracketed exposures, dark, normal, and bright, open in Photoshop. Go to File, select Open as Layers, and import all three; Photoshop stacks them automatically.
Rename each layer clearly: "Dark Exposure," "Normal Exposure," "Bright Exposure." Arrange them with dark on top, bright on bottom.
Step 2: Set Up Your Layer Structure
Hide the middle and bottom layers by clicking their eye icons. Work with your dark exposure first. This layer will control the window brightness.
Add a layer mask to the dark exposure and paint black over areas where you want the layers below to show through, starting with the windows and blown-out bright areas. Use a soft brush at 30-50% opacity for smooth blending.
Step 3: Blend Exposures and Adjust Layer Opacity
Reduce the dark layer's opacity to 60-70% so the normal exposure shows through, bringing interior details into view while windows stay protected.
Select your normal exposure layer, add a mask, and paint black over any remaining problem areas, usually refining shadows or bringing out details in darker corners.
Check your result at 100% zoom on the windows, corners, and edges, looking for visible blending lines or unnatural transitions. Adjust opacity and mask painting until everything looks smooth.
Step 4: Apply Masks and Make Selective Edits
Now add adjustment layers for color and tone. Go to Layer, select New Adjustment Layer, and choose Curves or Levels. These automatically get masks, so you can paint to apply corrections selectively.
Use Curves for overall brightness and contrast, and Hue/Saturation to make colors pop. Each adjustment layer can be masked, so you control exactly where changes happen.
For real estate photos, aim for warm, inviting tones. Slightly boost saturation to make the space feel alive. Adjust white balance if the light looks too blue or too orange.
Step 5: Color Accuracy and Final Retouching
Real estate photos need accurate color, since buyers expect the image to match what they see in person (When Does Enhancing Listing Photos Go Too Far?).
Do final retouching: remove distracting objects, fix small blemishes, and brighten dark corners slightly.
Flatten your image only when you're completely done: go to Image, select Flatten Image, then save as a high-quality JPEG for web use.
Common Mistakes to Avoid When Editing with Layers
Forgetting to select the correct layer. You make edits but nothing happens because the wrong layer is selected.
Using layer opacity instead of masks. Reducing opacity makes the entire layer transparent, while masks let you hide specific areas.
Not naming your layers. After 10 layers, you can't remember which is which. Spend 10 seconds naming each one clearly.
Painting too hard with your brush. Harsh blending lines ruin real estate photos.
Forgetting to save your layered file. If you flatten, save as JPEG, then need to adjust something, you're stuck.
Keyboard Shortcuts and Efficiency Tips
Master these shortcuts to edit faster:
- Ctrl+T (Windows) or Command+T (Mac): Transform tool
- Shift+Ctrl+N (Windows) or Shift+Command+N (Mac): New layer
- Alt+click layer (Windows) or Option+click layer (Mac): Select multiple layers
- Ctrl+] (Windows) or Command+] (Mac): Move layer up
- Ctrl+[ (Windows) or Command+[ (Mac): Move layer down
- Ctrl+Shift+E (Windows) or Command+Shift+E (Mac): Flatten image
Use Layer Groups to organize complex projects: right-click in the Layers panel, select New Group, and drag related layers in.
Set up layer presets for your most common workflows.
Professional real estate editing means mastering layers. Exposure blending, layer masks, and selective adjustments separate average listings from photos that sell homes.
The Desert Home Photography team uses these layer-based techniques on every project. Hand-blended exposures create natural-looking images that buyers trust.
Editing real estate photos requires technical skill and creative eye. Ready to elevate your listings? Adobe's official Photoshop layer documentation provides detailed references for advanced techniques.
Frequently Asked Questions
How do you blend multiple exposures in Photoshop for real estate photos?
Import your bracketed shots as separate layers in Photoshop. Stack them with the properly exposed interior as your base layer and the well-exposed window shot above it. Use a layer mask on the top layer and paint with a black brush to reveal the window exposure beneath. Adjust layer opacity to 80-90% for a natural blend. Use a soft brush on the mask to feather the edges and avoid visible seams. This exposure blending technique is essential for real estate photos where windows are either blown out or the interior is too dark.
Can I edit photos with layers in software other than Photoshop?
Yes. Affinity Photo, Luminar, and GIMP all support layer-based editing for real estate photos. Each has a layer panel where you can organize multiple layers, adjust opacity, and apply masks. Affinity Photo is particularly popular for real estate work because it offers non-destructive editing and powerful masking tools at a lower cost than Photoshop. The workflow is similar across all programs: import images, create layers, use masks, and blend for natural results.
What is a layer mask and how does it help with real estate photo editing?
A layer mask is a grayscale image attached to a layer that controls visibility. White areas show the layer, black areas hide it, and gray areas create transparency. In real estate editing, masks let you selectively blend exposures, remove unwanted objects, or apply adjustments to only part of an image without permanently altering pixels. For example, use a mask to blend a bright window exposure into an interior shot without affecting the walls. This non-destructive approach lets you revise edits later without losing quality.
How do I add a photo to an existing layer in Photoshop?
Use File > Place Embedded (or Place Linked) to insert an image into your current document. Photoshop creates a smart object on a new layer. Use the Transform tool (keyboard shortcut: Ctrl+T on Windows, Cmd+T on Mac) to resize and position the image. Alternatively, copy a photo, create a new layer, and paste it, then use Transform to align it. Once positioned, adjust layer opacity and add a mask if needed to blend it seamlessly with the background layer. This method is ideal for composite real estate images or adding sky replacements.