 how-to
Natural Light Techniques for Residential Photography
Table of Contents
- Natural Light Techniques for Residential Photography: A Room-by-Room Workflow
- Real Estate Photography Camera Settings for Natural Light Interiors
- How to Photograph a Room With Windows Without Blowing Out the View
- The Best Time of Day for Real Estate Photography by Room Type
- Interior Photography Composition Tips for Listing Photos That Sell
- Softening Harsh Sunlight and Correcting Mixed-Light Color Casts
- Troubleshooting Difficult Rooms: Dark Spaces, Small Windows, and Bright Exteriors
- Conclusion: Build a Repeatable Natural Light Routine
- Frequently Asked Questions
Last Updated: October 14, 2026
Natural Light Techniques for Residential Photography: A Room-by-Room Workflow
Natural light techniques for residential photography are the methods that use daylight instead of flash to make a home look bright, open, and true to life. At Desert Home Photography, we shoot listings across the Phoenix Valley, and daylight does most of the work in nearly every room. The trick is knowing how to shape it.
Below, we break down a repeatable workflow: camera settings, window handling, timing, and fixes for the rooms that fight back. Most homes need only small adjustments once you understand how light moves through a space.
Why Natural Light Beats Flash in Most Homes
Flash flattens a room. It kills depth, washes out texture, and makes a space feel smaller than it is.
Daylight shows how a room actually lives. It reveals the shape of a space and the way a buyer's eye will travel through it. That matters when the goal is to make a listing feel inviting.
A few reasons daylight wins:
- It shows true wall and floor color
- It creates soft shadows that add depth
- It keeps window views visible
- It looks honest, not staged
The catch: daylight changes by the hour. Learning to work with it, not against it, is the whole skill.
Real Estate Photography Camera Settings for Natural Light Interiors
Real estate photography camera settings for natural light interiors start with a wide aperture, a low ISO, and a tripod. A good starting point is f/8, ISO 100, and a shutter speed that keeps the histogram centered.
A Starting Point You Can Adjust
Try these settings on your first room:
- Aperture: f/7.1 to f/9 for sharp corners
- ISO: 100 to 200 for clean files
- Shutter speed: 1/60s or slower, tripod required
- White balance: Daylight, then fine-tune
- Focus: Manual, set to the far corner
The one thing nobody tells you about settings is that shutter speed is your exposure lever. Aperture and ISO stay locked for consistency. Shutter speed moves to match the light.
How to Photograph a Room With Windows Without Blowing Out the View
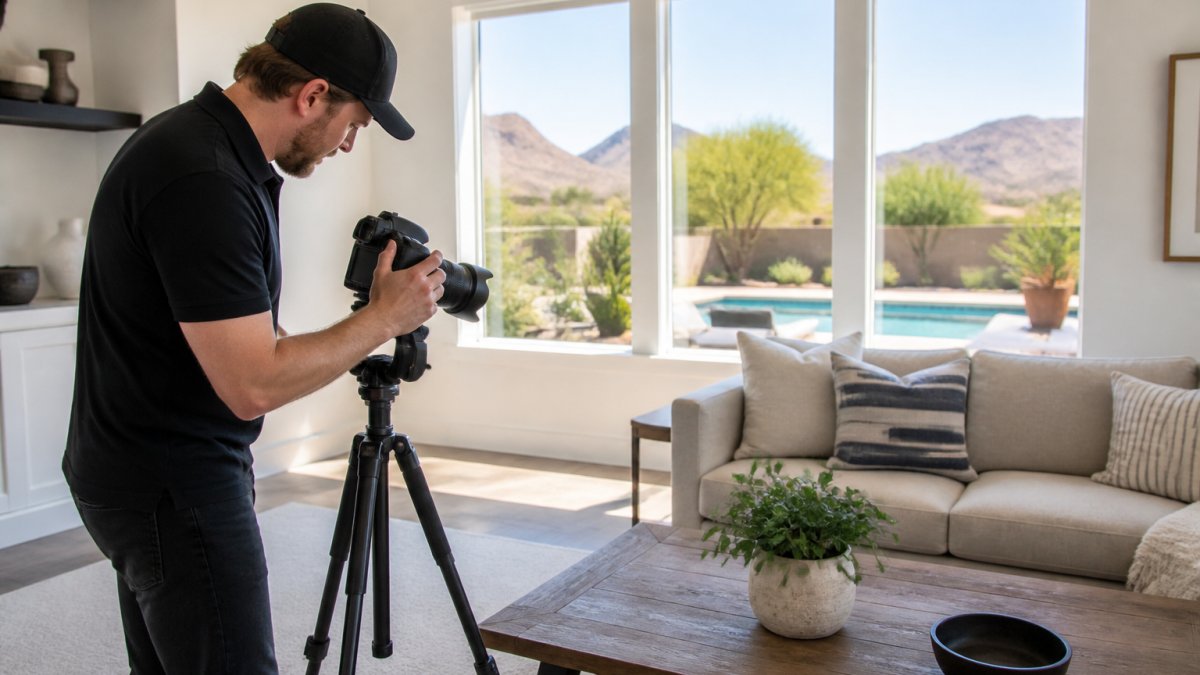
To photograph a room with windows without blowing out the view, you have to accept one fact up front: a single frame cannot hold both the bright exterior and the darker interior.
Three Ways to Solve the Window Problem
Most practitioners choose between three approaches. Each has a clear trade-off.
Exposure bracketing. Shoot three to five frames at different shutter speeds, then blend. This preserves the most natural look and keeps window views crisp.
Flash fill. Add a speedlight or strobe bounced off a wall or ceiling to lift the interior while the window stays exposed. This is faster than bracketing and works handheld.
Window pulls. Expose for the interior, then in editing replace the blown window with a darker exposure of the same view.
A Repeatable Bracketing Workflow
A simple bracket set that works in most rooms:
- Set a base exposure for the interior at f/8, ISO 100, with the histogram centered. This is your middle frame.
- Meter the window and note how many stops brighter it is. A bright overcast day is often 3 stops; direct sun can be 5 or more.
- Shoot the bracket at 2-stop intervals: -4, -2, 0, +2 relative to the base. That gives you a frame for the window, a frame for the shadows, and two in between.
- Blend in editing using luminosity masks or a hand-blended workflow. Keep the window frame's exterior and the base frame's interior.
A common pattern is to bracket at 2-stop intervals rather than 1-stop. It reduces the number of frames and still covers the range. If the window is extremely bright, add a 6-stop frame rather than shooting more 1-stop steps.
When to Skip Bracketing
Bracketing is not always the answer. If the window view is unremarkable, a neighboring wall, a parking lot, a dull sky, a single frame exposed for the interior is often enough, and the blown window reads as bright rather than broken. Similarly, if the room is small and the window is the only light source, a single frame with a reflector may beat a bracket set because it preserves the natural falloff.
The decision rule: bracket when the view is part of the listing's value. Skip it when the view is not.
The Best Time of Day for Real Estate Photography by Room Type
The best time of day for real estate photography depends on which way the room faces. East-facing rooms look best in the morning. West-facing rooms look best in the late afternoon.
Planning Around Sun Path for a Specific Property
Before a shoot, check the sun path for that address. A quick sun-path tool shows where the light will be at your arrival time.
| Room Direction | Best Time | Why |
|---|---|---|
| East-facing | Morning | Direct, soft light |
| West-facing | Late afternoon | Warm, angled light |
| North-facing | Midday | Even, no harsh glare |
| South-facing | Early or late | Avoid harsh overhead sun |
Plan the shoot order around this. Start in the rooms that peak first, then move to the ones that improve later.
Interior Photography Composition Tips for Listing Photos That Sell
Interior photography composition tips come down to three rules: shoot from a corner, keep verticals straight, and leave room to breathe. These small choices separate a listing photo from a snapshot.
Try these on your next shoot:
- Shoot from a corner at chest height
- Keep the camera level, not tilted up
- Leave space around furniture
- Include one clear focal point
- Avoid shooting into a dark hallway
Composition is what makes a buyer pause. A well-framed room reads as bigger and calmer.
Softening Harsh Sunlight and Correcting Mixed-Light Color Casts
Harsh sunlight and mixed color are the two problems that ruin interior shots. Both have simple fixes, but the fixes are not interchangeable, the right one depends on the room, the light sources, and how much editing time you have.
Softening Harsh Sunlight
Direct sun through a window creates two problems at once: blown highlights on the floor or furniture, and deep shadows on the opposite wall. The goal is to reduce the contrast between the two.
- Wait for a cloud, or shoot in open shade. A thin overcast turns direct sun into a soft, even source. If you can schedule the shoot around cloud cover, do it.
- Diffuse the window with a sheer curtain. A white sheer drops the window's brightness by roughly 1 to 2 stops and softens the edge of the light. This is the fastest fix and requires no gear.
- Reposition the camera away from direct beams. Shooting from the shadow side of the room reduces the chance of a sunbeam crossing the frame.
- Use a reflector to fill the shadow side. A 5-in-1 reflector with the white or silver side lifts the shadow wall without adding a second color temperature.
Correcting Mixed-Light Color Casts
Mixed light is the harder problem. Daylight is cool, roughly 5,500K on a clear day, higher in shade. Tungsten bulbs are warm, around 2,700K to 3,000K. LED bulbs vary widely, often 2,700K to 5,000K, and some are dimmable with a color shift as they dim.
The decision tree:
- If the room lights are decorative and not needed for the shot, turn them off. This is the cleanest fix. Let daylight do the work, and set white balance to Daylight.
- If the lights are needed to show the room as it lives, match the sources. Gel the flash or the room lights to the same color temperature, or replace the bulbs for the shoot with a known temperature.
- If neither is possible, correct in editing. This is the last resort because it is the slowest and the most likely to look artificial. Use local color correction rather than a global white balance shift, and check the result against a neutral reference in the frame.
A common pattern is to carry a small set of color correction gels, full and half CTO and CTB, and a few spare daylight-balanced bulbs. That covers most residential mixed-light situations without a full lighting kit.
A Note on Accuracy
The goal is not to make every room look the same. It is to make each room look like itself. A warm bedroom lit by lamps should read as warm; a cool kitchen lit by north-facing windows should read as cool. Correcting a cast is different from neutralizing a room's character. Keep the character, remove the cast.
Troubleshooting Difficult Rooms: Dark Spaces, Small Windows, and Bright Exteriors
Dark rooms, tiny windows, and glaring exteriors all have workarounds. The key is to change what you can control: camera position, timing, and added light.
A quick fix chart:
| Problem | Fix | Result |
|---|---|---|
| Dark room | Open all doors, add a reflector | Brighter interior |
| Small window | Shoot toward the light source | More depth |
| Bright exterior | Bracket and blend | Balanced view |
| Mixed bulbs | Turn lights off | Clean color |
When a room still fights back, that is when a professional shoot pays off. Desert Home Photography handles these problem rooms with hand-blended imaging and careful camera placement, so a dark bedroom never looks like a dungeon.
Conclusion: Build a Repeatable Natural Light Routine
Every home is different, but the routine stays the same: check the sun path, set your camera, bracket the windows, and blend. That process turns a tricky room into a clean listing photo.
If you want your listings to stand out without the guesswork, Desert Home Photography offers hand-blended imaging, FAA-licensed drone photography, and immersive virtual walk-through tours. We serve agents and homeowners across the Phoenix Valley who need fast, reliable, high-quality media.
Call or text Desert Home Photography to book your next listing shoot and get photos that sell the home.
Frequently Asked Questions
What time of day is best for natural-light home photography?
The best time depends on the room's window orientation. East-facing rooms get soft morning light, west-facing rooms peak in late afternoon, and north-facing rooms stay consistent all day. South-facing rooms can blow out at midday, so shoot them early or late. For most listings, schedule the shoot when the majority of key rooms have indirect, diffused light rather than direct sun. Walk the property the day before to confirm.
How do you photograph a room with bright windows without losing the view?
Exposure bracketing is the standard approach. Shoot three to five frames at different shutter speeds, then blend the window and interior exposures in editing software. A graduated neutral density filter can also help balance the sky and room in a single frame. If you cannot bracket, expose for the window and lift shadows in post, but expect more noise. Tripods are essential for this technique.
Should you use flash when photographing a home with natural light?
In most residential photography, natural light alone produces warmer, more inviting images. Flash can flatten a room or create harsh shadows that make spaces feel smaller. Use a flash only as a subtle fill light when a room is genuinely too dark, and bounce it off a wall or ceiling rather than pointing it directly at the subject. For rooms with good window light, skip the flash and rely on exposure blending instead.
What camera settings work best for natural-light interior photography?
Start with an aperture between f/7.1 and f/11 for sharpness across the frame, ISO 100 to 400 to limit noise, and a shutter speed that keeps your histogram centered without clipping highlights. Use a wide-angle lens, typically 16-24mm on a full-frame body, to capture more of the room. Always shoot in RAW so you have room to correct white balance and recover shadow detail during editing.