 how-to
9 Kitchen Counter Styling Tips for Listing Photos
Last Updated: October 24, 2026
Quick Summary
Kitchen counter styling involves strategically arranging 3-5 items on your counters to create an inviting, move-in-ready appearance for listing photos. Remove clutter entirely, keep only functional and decorative pieces that photograph well, and arrange them in balanced vignettes across the counter to maximize visual appeal and open space.
- A typical kitchen counter holds 15-20 items, but a camera-ready counter holds only 3-5 items maximum
- Sort counter items into three categories: Keep in Frame, Remove for the Shoot, or Hide Out of Sight in cabinets
- Arrange styled items in groups of three using the Rule of Three to create visual harmony and prevent clutter
- Test your styling with a wide-angle phone camera before the photographer arrives to see how items actually appear
- Match your styling to your home's price point: modest homes emphasize functionality, luxury homes showcase lifestyle and aspiration
Table of Contents
- Why Kitchen Counter Styling Matters in Real Estate Photography
- Decluttering Kitchen for Listing Photos: The Foundation
- Kitchen Staging Checklist for Sellers: Before the Camera Arrives
- Best Kitchen Counter Decor for Real Estate: Strategic Placement
- Camera-Ready Counter Styling: Wide-Angle and Lighting Considerations
- Counter Styling for Different Buyer Audiences and Price Points
- Your Photography Day Checklist and Final Walkthrough
- Frequently Asked Questions
Why Kitchen Counter Styling Matters in Real Estate Photography
The kitchen is the second-most photographed room in any listing, right after the master bedroom, and kitchen counter styling is what buyers study longest in any space. A cluttered or poorly lit counter kills the sale before a buyer steps inside.
Homes with high-quality listing photos sell faster and at higher prices than those with amateur shots, and the kitchen counter is where that quality shines or fails.
Buyers see what the camera shows.
Decluttering Kitchen for Listing Photos: The Foundation
Before you style anything, remove everything. This is the hardest and most important step.
Keep in Frame (3-5 items maximum):
- One functional anchor (coffee maker, kettle, or cutting board)
- One food prop (fruit bowl, fresh herbs, lemons)
- One decorative accent (small plant, neutral ceramic, folded linen)
Remove for the Shoot (leave the room entirely):
- Mail, papers, coupons, and takeout menus
- Medicine bottles, supplements, and personal care items
- Kids' toys, school supplies, and pet food bowls
Hide Out of Sight (store, don't just move):
- Small appliances you use daily but don't want photographed (toaster, blender, air fryer, Instant Pot)
- Utensil crocks that are functional but visually noisy
- Paper towel holders and soap dispensers that clash with the styling
A typical kitchen counter holds 15-20 items. A camera-ready counter holds 3-5. That ratio is the whole game.
Where to put what you hide:
- Small appliances: inside a pantry, lower cabinet, or garage shelf
- Cords and chargers: a drawer organizer or a labeled zip bag in a cabinet
- Paper towels and soap: under the sink or in a closet
If something doesn't fit in your cabinets, it doesn't belong on the counter during photos.
Use Declutter for a Quick Home Sale: 2026 Guide for a comprehensive approach to clearing your entire home before the photography session.
Sort every counter item into one of three categories based on what works best for listing photos.
| Category | What to Do | Examples |
|---|---|---|
| Keep in Frame | Leave on counter, 3-5 items max | Coffee maker, fruit bowl, small plant |
| Remove for the Shoot | Take out of room entirely | Mail, medicine bottles, pet food bowls |
| Hide Out of Sight | Store in cabinets or drawers | Toaster, blender, paper towel holder |
Kitchen Staging Checklist for Sellers: Before the Camera Arrives
Staging your kitchen counter for listing photos requires a specific workflow. Follow this checklist.
One week before:
- Deep clean all countertop surfaces with appropriate cleaner for the material
- Polish faucets, sink, and stainless steel appliances
- Wipe down cabinet fronts and handles
Three days before:
- Remove all items from counters except those you plan to style
- Clean inside cabinets that will be photographed (open doors show interior)
- Declutter the countertop area completely
One day before:
- Arrange your styled items (coffee station, cutting board, fruit bowl)
- Take test photos with your phone to see how items appear on camera
- Adjust lighting by opening all window treatments
Morning of the shoot:
- Do a final light wipe of all surfaces
- Make sure no fingerprints are visible on appliances
- Check that all items are in their exact positions
Use Tips for Staging Homes for Professional Photography for complete staging guidance across your entire home.
Best Kitchen Counter Decor for Real Estate: Strategic Placement
A styled kitchen counter tells a story: this home is well-maintained, organized, and ready for someone to move in and start cooking. The goal is visual balance, not decoration, you're creating the appearance of a clean, functional, move-in-ready home.
This section gives you countertop-specific prop plans and a camera-frame check so the styling survives a wide-angle listing photo.
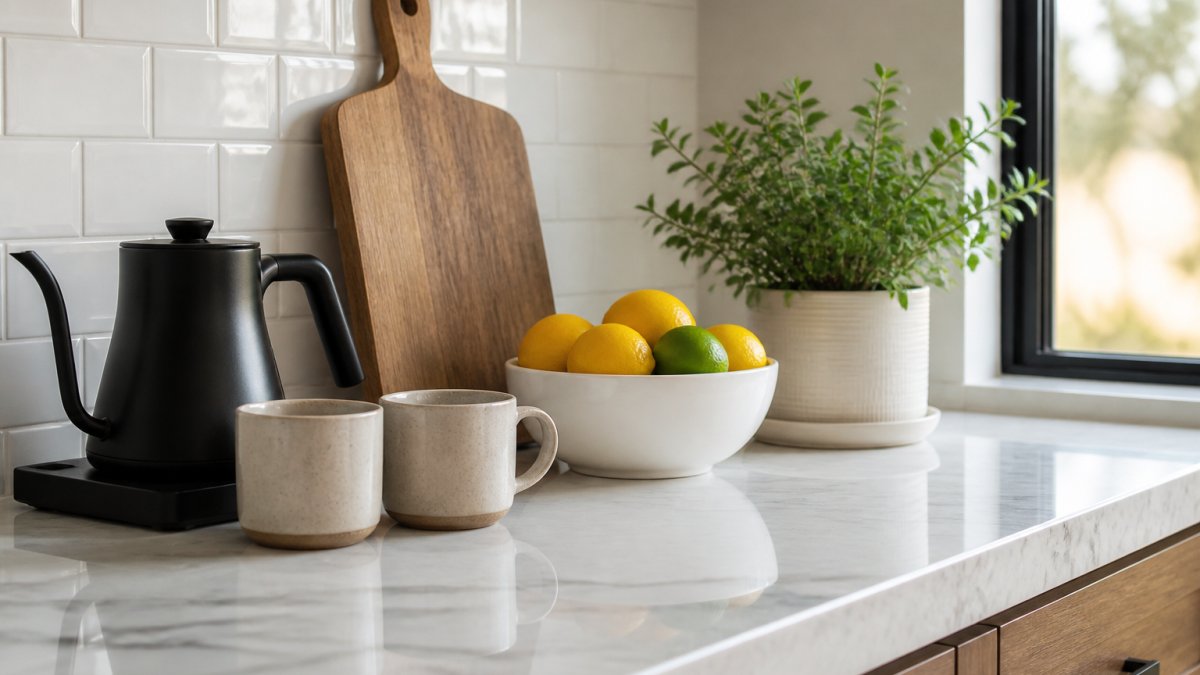
The Rule of Three and Visual Balance
Arrange items in groups of three. This creates visual harmony and prevents the counter from looking either empty or cluttered.
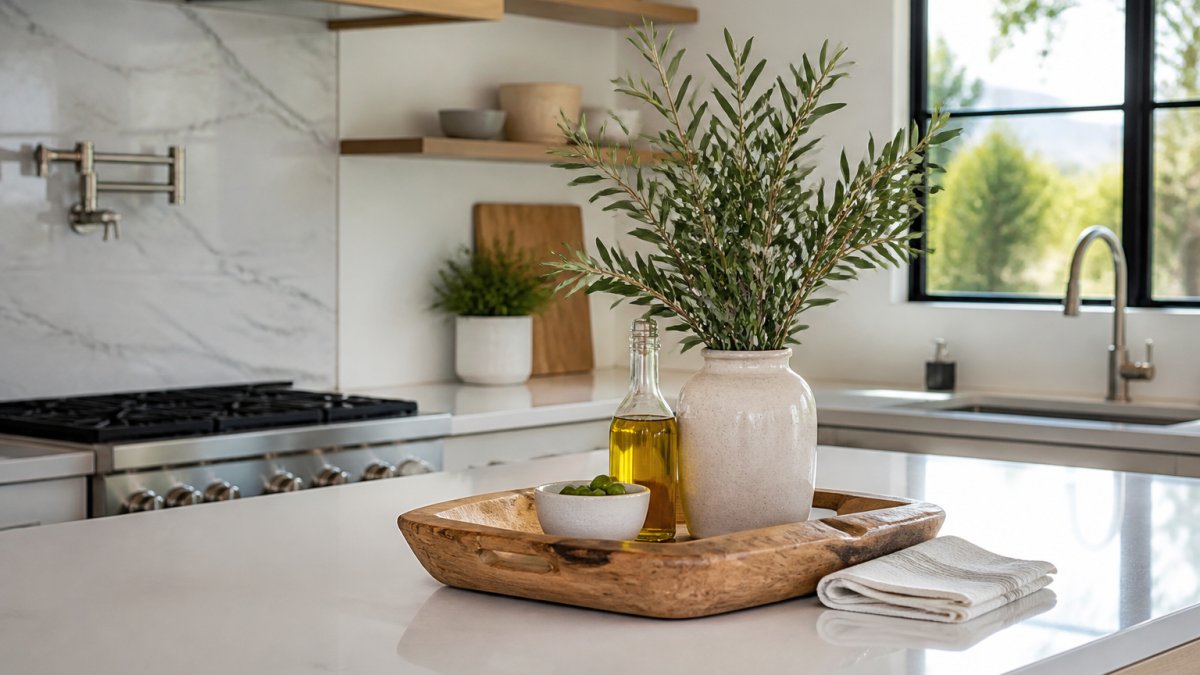
A vignette is a small grouped arrangement of items that work together, a mini-scene. A coffee station is one vignette; a cutting board with a fruit bowl is another.
Space these vignettes across the counter rather than clustering everything in one area, and use negative space, the empty surface that lets the eye rest.
Each vignette should have:
- One functional item (coffee maker, cutting board)
- One food prop (fruit bowl, fresh herbs)
- One decorative accent (small plant, candle, or folded linen)
This combination looks intentional and styled without appearing overdone.
Countertop-Specific Prop Plans
Generic decor advice fails because every counter is different. Use these tailored setups.
Kitchen island:
- One low, wide vignette in the center or offset to one side
- A wooden cutting board with a small bowl of fruit and a single herb pot
- Keep the island's leading edge clear so the photo shows usable workspace
Small kitchen:
- One vignette only, scaled down
- A small kettle, two mugs, and a single lemon or sprig of greenery
- Use vertical space sparingly; a leaning cutting board adds height without footprint
Dark counters (granite, soapstone, dark quartz):
- Use light-colored props: white ceramic, cream linen, pale wood
- Add one bright food prop (lemons, limes, green apples) for contrast
- Avoid dark accessories that disappear into the surface
Light counters (white marble, quartz, laminate):
- Add warmth with wood, terracotta, or natural fiber
- Use one darker accent (matte black kettle, dark ceramic bowl) for definition
- Avoid an all-white vignette that washes out in bright light
Limited natural light:
- Keep the vignette simple and close to the main light source
- Use reflective or glossy accents sparingly to bounce light
- Avoid tall items that cast shadows across the counter
Creating a Coffee or Tea Station
A coffee or tea station is the easiest vignette to style and the most appealing to buyers.
Add two or three mugs nearby. Use neutral colors: white, cream, gray, or natural ceramic. Avoid bright colors or novelty mugs.
Include one small accessory: a wooden tray, a dish for coffee pods, or a container of sugar packets.
The station should occupy roughly 18-24 inches of counter space. It looks inviting without dominating the counter.
Camera-Frame Check Before the Shoot
Wide-angle lenses capture more of the room but also distort perspective. Items that look balanced to your eye may look off-center or crowded on camera. Before the photographer arrives, run this check:
- Take a test photo from the kitchen entry with your phone's wide-angle lens
- Check the frame edges: is anything cut off or crowding the border?
- Look at the sightlines: does any prop block the view of the backsplash, window, or appliance?
Use Choosing the Right Lighting for Interior Home Photos to understand how professional lighting affects the way your counters appear in the final images.
Camera-Ready Counter Styling: Wide-Angle and Lighting Considerations
Professional listing photos use wide-angle lenses, which capture more of the room but distort perspective slightly.
Lighting is everything. A beautifully styled counter in dim light loses all appeal. A simple counter in bright, natural light looks inviting.
Optimal lighting for kitchen photos:
- Morning light (8 AM to 11 AM) from east-facing windows
- Late afternoon light (3 PM to 5 PM) from west-facing windows
- Avoid harsh midday sun, which creates dark shadows under cabinets
Reflective surfaces (granite, quartz, stainless steel) bounce light; matte finishes (concrete, laminate) absorb it. Position styled items where they catch the most light.
Counter Styling for Different Buyer Audiences and Price Points
A $300,000 home and a $1.2 million home are styled differently. Understand your buyer.
For first-time homebuyers and modest-price homes ($200K-$500K):
- Style toward functionality and cleanliness
- Show a coffee maker, clean counters, and fresh fruit
- Emphasize that the space is ready to move into
For mid-range homes ($500K-$1M):
- Balance functionality with subtle style
- Add a small plant or fresh flowers
- Use coordinated accessories in neutral tones
For luxury homes ($1M+):
- Style toward lifestyle and aspiration
- Use high-end accessories and finishes
- Coordinate colors and materials intentionally
Mismatched styling confuses buyers. A luxury coffee maker on a modest counter feels out of place. A basic mug in a high-end kitchen looks cheap. Match your styling to the home's market position.
Your Photography Day Checklist and Final Walkthrough
The day of your shoot is not the time to make changes. Everything should be ready 24 hours before.
Morning of the shoot (2-3 hours before the photographer arrives):
- Do a final wipe of all counter surfaces with a microfiber cloth
- Check for fingerprints on appliances and faucets
- Verify that all styled items are in their exact positions
Photographer arrival:
- Show them your styled counter and explain your vision
- Point out the best angles and natural light sources
- Ask them to capture wide shots and detail shots
After the shoot:
- Do not move anything until the photographer confirms they have all shots
- Ask about the timeline for edited photos
- Discuss any touch-ups or adjustments you'd like
When you're ready to book professional photography, Desert Home Photography's professional real estate and architectural photography services can handle the full shoot with hand-blended editing, FAA-licensed drone photography, and virtual walk-through tours to showcase your home's best features.
A styled kitchen counter takes effort, but it pays off. Buyers form opinions in seconds. The counter is where they decide if this home is worth a full tour.
Frequently Asked Questions
How do you stage kitchen counters for real estate photos?
Start by removing all clutter and personal items. Then arrange a small number of functional, attractive accessories, a coffee station, cutting board, or fruit bowl, in intentional groupings. Leave at least 50% of counter surface visible to emphasize spaciousness. Position items toward one end of the counter to create negative space, and ensure the backsplash and countertop material are clean and polished. Use natural light and avoid shadows across work surfaces.
What items should be removed from kitchen counters before taking listing photos?
Remove personal items like family photos, mail, and magnets. Clear away small appliances unless they're high-end or part of a styled station. Take out grocery bags, dish racks, and cleaning supplies. Avoid displaying medications, pet items, or anything that dates the kitchen. The goal is a neutral, clutter-free look that helps buyers envision their own belongings in the space.
What is the rule of three in kitchen counter styling?
The rule of three means grouping items in odd numbers, typically three objects, to create visual interest without clutter. For example, pair a kettle with two mugs and a small plant, or arrange a cutting board with a fruit bowl and a small decorative item. This creates balance and feels intentional rather than sparse, making the counter look both functional and inviting in listing photos.
How much counter space should be visible in real estate photos?
Aim for at least 50% of counter surface to remain clear and visible. This emphasizes spaciousness and allows buyers to mentally picture their own kitchen workflow. Leaving large areas of open counter space also gives the room a clean, organized feel and prevents the kitchen from appearing cramped or overstuffed in photographs.
Your kitchen counter is the first impression buyers get of how the home is maintained. A clean, styled counter signals that the entire home is cared for. Invest the time to get it right, and the photos will sell the home.