 how-to
How Do You Stage Outdoor Living Spaces for Luxury Real Estate?
Last Updated: October 25, 2026
Quick Summary
To stage outdoor living spaces for luxury real estate, start with a deep clean and declutter, then arrange furniture to define entertaining zones, add coordinated cushions and rugs, incorporate strategic lighting, and ensure landscaping is manicured and maintained. This transforms outdoor areas into resort-inspired spaces that create emotional connection and justify premium pricing.
- Position seating to encourage conversation and define distinct dining and lounging zones
- Use 2-3 neutral base colors and 1-2 accent colors consistently across furniture, cushions, and décor for cohesive design
- Incorporate landscape lighting with path lights, uplighting, and accent lighting to create evening ambiance
- Pressure wash all surfaces, trim hedges, edge garden beds, and remove dead branches two weeks before photography
- Arrange lounge chairs and umbrellas around pools to create an inviting resort atmosphere with pristine water clarity
Table of Contents
- Why Staging Outdoor Living Spaces Matters for Luxury Listings
- How to Stage a Patio for Real Estate Photos
- Backyard Staging Ideas for Luxury Homes
- Pool Area Staging for Real Estate Photography
- Creating Cohesive Design and Lighting for Outdoor Appeal
- Real Estate Photography Preparation Checklist
- Preparing Your Outdoor Spaces for Professional Photography
- Frequently Asked Questions
Why Staging Outdoor Living Spaces Matters for Luxury Listings
When you stage outdoor living spaces for luxury real estate, it isn't optional, it's the difference between a property that sits on the market and one that sells. Buyers shopping in the luxury segment don't just purchase square footage.
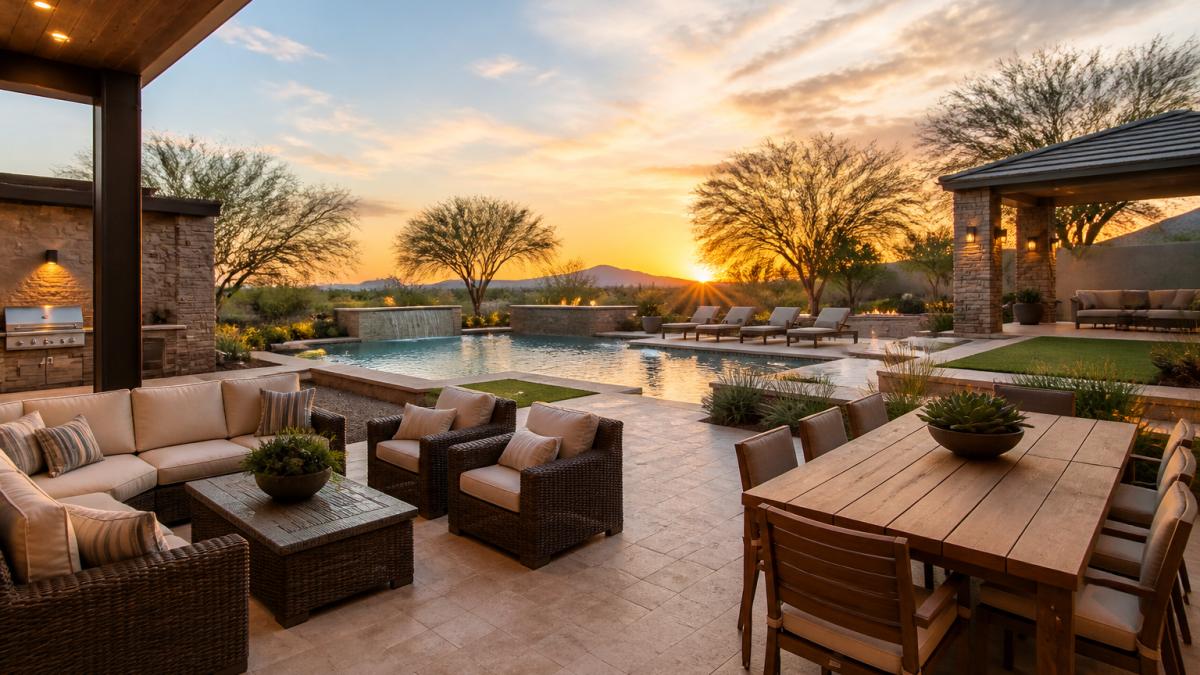
The outdoor space is often the first thing potential buyers see. A neglected yard, cluttered patio, or poorly lit deck sends an immediate message: this property isn't ready.
The properties that move fastest aren't always the biggest, they're the ones where the outdoor space feels like an extension of the home's lifestyle promise.
The stakes are real. Luxury buyers expect polished, move-in-ready spaces. A staged outdoor area signals that every detail has been considered. It justifies premium pricing and accelerates sale timelines.
How to Stage a Patio for Real Estate Photos
Your patio is the centerpiece of outdoor entertaining. Staging it correctly means creating a space that looks both inviting and functional in photographs and in person.
Start with a deep clean. Pressure wash the patio surface, remove any debris, and inspect for cracks or damage. A pristine surface photographs beautifully and signals maintenance to buyers. Next, declutter completely.
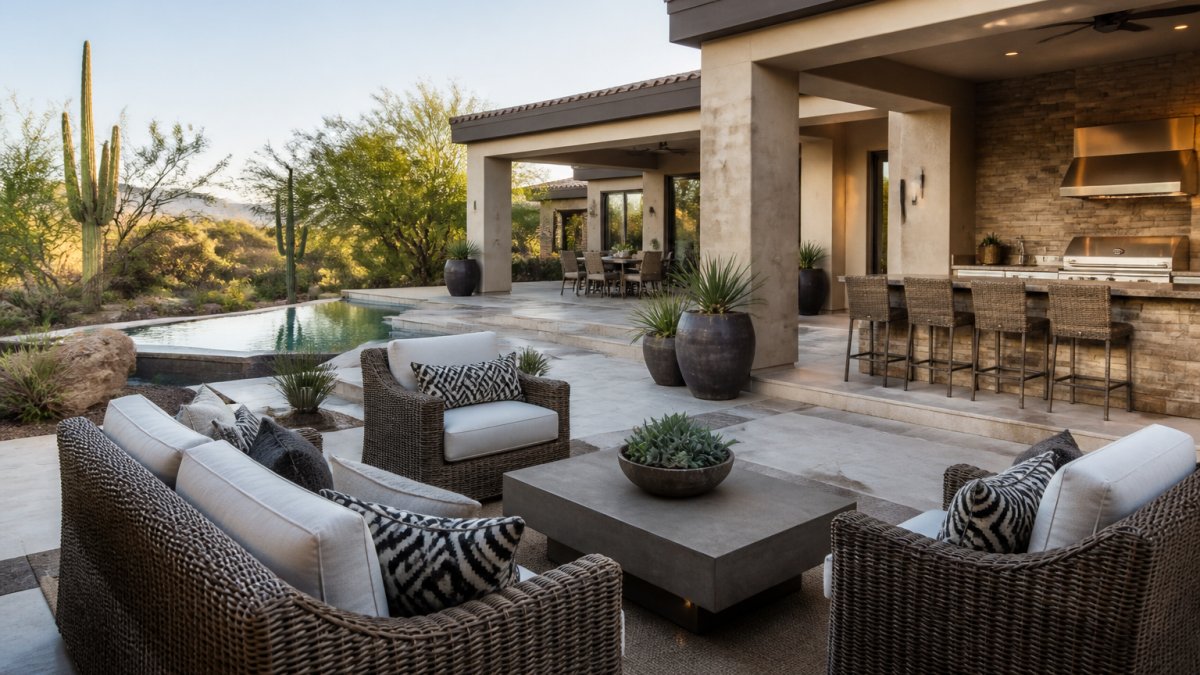
Furniture arrangement matters enormously. Position seating to encourage conversation and flow. Group chairs and tables to define the dining and lounging zones. A common mistake is overcrowding the patio with too many pieces. Leave breathing room. Buyers need to envision themselves using the space, not feel cramped.
Add layers of comfort with outdoor cushions and throw pillows in neutral tones or complementary colors. Quality cushions signal investment and care. A plush outdoor rug anchors the seating area and adds warmth to the space.
Here's what to do next:
- Clean all furniture and cushions thoroughly
- Arrange seating to create distinct zones for dining and lounging
- Add outdoor rugs to define spaces and add texture
- Place side tables within reach of seating areas
- Include weather-resistant throw pillows in cohesive colors
- Position planters with seasonal flowers or greenery strategically
- Test sightlines from multiple angles to ensure the space photographs well
Consider how to prepare your backyard for listing photos for detailed staging techniques tailored to photography sessions. Professional staging combined with professional photography creates the strongest impression on potential buyers reviewing listings online.
Backyard Staging Ideas for Luxury Homes
Luxury buyers expect resort-inspired outdoor spaces. Your backyard staging should reflect that standard of polish and intentionality.
Begin with landscaping. Trim hedges, edge garden beds, and remove dead branches. Healthy, manicured landscaping creates immediate curb appeal and signals property maintenance. Mow the lawn and edge pathways crisply. These details matter in photographs.
Create defined zones within the backyard. A dining area near the patio, a lounge zone with comfortable seating, and a garden or water feature area each serve a purpose. Zoning makes the space feel organized and functional.
Incorporate natural elements strategically. Potted plants, flowering shrubs, and garden beds add color and life. Avoid overgrown or unkempt vegetation. Everything should look intentional and maintained.
Lighting transforms the backyard after dark. Even in photographs taken during daylight, visible lighting fixtures hint at evening ambiance. Path lights, uplighting on trees, and accent lighting on architectural features create visual interest.
Key staging elements for luxury backyards:
- Manicured landscaping with trimmed hedges and clean garden beds
- Defined entertaining zones with clear sightlines
- Potted plants and flowers in coordinating colors
- Outdoor lighting fixtures positioned for evening appeal
- Seating arrangements that encourage entertaining and relaxation
- Water features or focal points that draw the eye
- Hardscape elements like pergolas or fire pits in good repair
Learn more about tips for staging homes for professional photography to ensure your backyard staging translates perfectly to listing images and virtual tours.
Pool Area Staging for Real Estate Photography
A pool is a major selling feature in luxury real estate. Staging it correctly amplifies its appeal significantly.
Start with pool condition. The water should be crystal clear and perfectly balanced. Clean the pool deck thoroughly, removing any algae, stains, or debris. A spotless pool says quality and care.
Furniture around the pool matters as much as the pool itself. Arrange lounge chairs and cushioned seating to create an inviting resort atmosphere.
Landscaping around the pool should be immaculate. Trim any overhanging branches, remove fallen leaves, and ensure planters are vibrant and well-maintained. The pool area should feel like a retreat, not a maintenance project.
For photography, consider the time of day. Morning or late afternoon light creates the most flattering angles for pool areas. Reflections in the water add visual depth and appeal.
Pool area staging checklist:
- Drain and clean pool thoroughly; maintain perfect water clarity
- Power wash pool deck and surrounding surfaces
- Arrange lounge furniture in inviting configurations
- Add coordinating outdoor cushions and umbrellas
- Trim landscaping and remove debris around pool perimeter
- Position accent lighting to highlight the pool feature
- Ensure all pool equipment is clean and in good repair
- Remove personal items like toys, floats, or equipment
For drone photography and aerial views of your pool area, drone imagery for luxury real estate marketing captures the full scope of your outdoor entertaining space in ways ground-level photography cannot.
Creating Cohesive Design and Lighting for Outdoor Appeal
Cohesive design ties all outdoor spaces together. Buyers should feel the home flows seamlessly from inside to outside, with consistent design language throughout.
Start with a color palette. Choose 2-3 neutral base colors and 1-2 accent colors. Apply these consistently across furniture, cushions, planters, and décor. Cohesion creates sophistication and intentionality.
Materials matter too. Coordinate outdoor furniture styles. Mix high-end materials like teak, aluminum, and weather-resistant wicker. Avoid a hodgepodge of different furniture types. Everything should feel curated.
Lighting is transformative. Landscape lighting extends the visual appeal into evening hours and creates ambiance in photographs. Position lights to highlight architectural features, accent landscaping, and illuminate pathways. Soft, warm lighting feels inviting.
Incorporate lighting strategically:
- Path lights guide movement through the space
- Uplighting on trees and architectural features creates drama
- String lights or lanterns add warmth and festivity
- Accent lighting highlights water features or focal points
- Dimmer-controlled fixtures allow mood adjustment
Natural elements like wood, stone, and plants create warmth and visual interest. A pergola or shade structure adds architectural interest. A water feature or fire pit becomes a focal point.
For comprehensive guidance on interior lighting tips for real estate photography, apply those same principles to outdoor spaces. Professional photographers understand how to capture lighting that showcases your outdoor design at its best.
Real Estate Photography Preparation Checklist
Professional photography requires preparation. A well-prepared property photographs dramatically better than an unprepared one.
Two weeks before your shoot, begin your preparation. Deep clean all outdoor surfaces. Pressure wash patios, decks, and pool areas. Remove stains and debris. Trim landscaping. Remove dead branches and leaves.
One week before, declutter completely. Remove personal items, gardening tools, hoses, and anything that doesn't belong. Stage furniture in inviting arrangements. Add cushions and throws.
Three days before, do a final walkthrough. Check sightlines from multiple angles. Ensure lighting fixtures are clean and functional. Verify that all furniture is clean and positioned correctly.
The day before, do a final clean. Sweep away debris. Wipe down furniture. Ensure the pool is pristine if applicable. Check that outdoor lighting is working properly.
Pre-shoot preparation tasks:
- Pressure wash all outdoor surfaces (patio, deck, pool area, pathways)
- Trim landscaping, hedges, and remove dead branches
- Edge garden beds and remove weeds
- Deep clean all outdoor furniture and cushions
- Declutter completely; remove all personal items and tools
- Arrange furniture in inviting, functional configurations
- Add outdoor rugs, cushions, and throws in coordinated colors
- Position planters with fresh flowers or seasonal greenery
- Test all outdoor lighting fixtures for function and appearance
- Verify pool water is clear and pool deck is spotless
- Remove any visible wear or damage if possible; repair if necessary
- Check sightlines and angles for photography from multiple positions
For detailed preparation guidance specific to luxury properties, how to prepare a luxury home for architectural photography covers the comprehensive steps that ensure your outdoor spaces photograph beautifully.
Prepare your outdoor spaces systematically in the weeks and days leading up to your professional photography shoot.
| Timeline | Task | Details |
|---|---|---|
| Two weeks before | Deep clean and trim | Pressure wash all surfaces; trim landscaping and remove dead branches |
| One week before | Declutter and stage | Remove personal items; arrange furniture; add cushions and fresh flowers |
| Three days before | Final walkthrough | Check sightlines; verify lighting works; ensure furniture is positioned correctly |
| Day before | Final clean | Sweep debris; wipe furniture; confirm pool is pristine and lighting functional |
Preparing Your Outdoor Spaces for Professional Photography
Professional photography captures your outdoor spaces in their best light, literally. Preparation ensures the photographer can deliver images that sell.
Communicate with your photographer about timing and vision. Discuss which outdoor areas matter most and what time of day photographs best.
Clear the shot. Remove vehicles from driveways. Close garage doors. Remove trash bins and recycling containers from view. These details matter in wide-angle shots.
Ensure access. Make sure the photographer can move freely around the property. Clear pathways. Remove obstacles.
Stage for the camera. What looks good in person may not photograph well. Furniture that seems well-positioned might appear cramped in a photograph.
Professional photographers use techniques like hand-blended editing to bring out the best in your outdoor spaces.
Consider immersive virtual walk-through tours alongside photography.
Final preparation steps:
- Communicate shoot timeline and vision with your photographer
- Remove vehicles, trash bins, and personal items from view
- Clear pathways and ensure photographer access throughout the property
- Adjust staging based on photographer recommendations for camera angles
- Verify outdoor lighting is functional and positioned effectively
- Have a backup plan for weather-related delays or rescheduling
- Prepare to provide access to all outdoor areas including pool, deck, and garden spaces
Professional real estate photography combined with thoughtful staging transforms how your luxury property is perceived online and in person.
Selling a luxury home means competing for discerning buyers who expect polished, move-in-ready outdoor spaces.
Frequently Asked Questions
What should you remove before photographing a luxury patio?
Remove personal items, toys, trash cans, garden hoses, and any clutter that distracts from the space's appeal. Clear the patio of seasonal storage, potted plants that look neglected, and anything that suggests the space isn't actively maintained. A decluttered patio helps buyers envision their own entertaining lifestyle and makes the space photograph cleaner and more spacious.
How do you make a backyard look more inviting in listing photos?
Focus on creating defined zones for dining, lounging, and entertaining. Add comfortable seating with plush cushions, an outdoor rug to anchor the space, and strategic lighting that extends appeal into evening hours. Highlight landscaping with well-maintained gardens and accent lighting on focal points like pergolas or fire pits. Professional staging transforms a plain yard into a lifestyle destination buyers want to purchase.
What is the best time of day to photograph outdoor living spaces?
Golden hour, the first hour after sunrise or the last hour before sunset, provides warm, soft lighting that flatters outdoor spaces and creates an inviting atmosphere. Avoid harsh midday sun, which creates unflattering shadows and washes out colors. If you're working with a professional photographer, they'll coordinate timing to capture your outdoor spaces at their most photogenic moment for maximum buyer appeal.
Should outdoor furniture be staged for real estate photography?
Yes. Staged furniture shows buyers how to use the space and creates an emotional connection to the property. Choose high-quality, neutral-toned pieces that complement your home's style. Arrange seating to encourage conversation and entertaining. Well-chosen furniture transforms an empty yard into a resort-inspired outdoor living space that photographs beautifully and helps sell faster.